
When you’re planning a concrete installation project, you’ll want to understand the entire process from start to finish. It begins with defining the project scope and setting a realistic timeline. Next, preparing the site is essential for a successful pour. Throughout the process, clear communication with your contractor will keep everything on track. But that’s just the beginning—there are several key steps and potential challenges that can impact the outcome. Let’s explore what those are.
Key Takeaways
- Expect a clear project scope that outlines goals, budget, and timelines for the concrete installation process.
- Site preparation is crucial; expect debris removal, soil assessment, and leveling for a stable foundation.
- Anticipate discussions on concrete mix selection based on your project’s aesthetic and structural needs.
- Curing is essential; expect methods that maintain moisture and temperature to enhance concrete strength and durability.
- Be prepared for regular communication with your contractor regarding progress and any potential delays during installation.
Understanding the Project Scope
When you begin a concrete installation project, understanding the project scope is essential for ensuring a successful outcome. Start by clearly defining your project goals. What do you want to achieve? Whether it’s a driveway, patio, or foundation, knowing your end result guides every decision.
Next, consider budget considerations. Calculate costs for materials, labor, and any necessary equipment. It’s vital to align your project goals with your budget, ensuring you don’t overspend.
Communicate openly with your contractor about your vision and constraints, as this fosters collaboration and minimizes misunderstandings. By having a well-defined project scope, you’ll not only streamline the installation process but also improve the quality of your finished product, leading to satisfaction with the outcome.
Scheduling and Timeline Expectations
Effective scheduling and timeline expectations are essential for keeping your concrete installation project on track.
Begin by discussing the project phases with your contractor, ensuring everyone understands the sequence of tasks. Typically, these phases include site preparation, pouring, and curing.
Timeline management is vital; it helps you anticipate when each phase will begin and end.
Set realistic deadlines based on factors like weather conditions and material availability.
Regularly communicate with your contractor to monitor progress and address any delays promptly.
Preparing the Site for Installation
Before you start your concrete installation, it’s essential to conduct a thorough site assessment to identify any potential obstacles.
This includes preparing the ground properly and selecting the right materials and tools for the job.
Site Assessment Procedures
To guarantee a successful concrete installation, you must begin with a thorough site assessment, as this step lays the groundwork for the entire project.
Start with a site evaluation to identify the dimensions and soil conditions. Check for any obstructions like trees, utility lines, or drainage issues that could affect the installation.
It’s essential to take safety considerations during this phase; make sure the area is clear of hazards and complies with local regulations. Additionally, evaluate accessibility for equipment and materials.
Taking the time to assess these factors will help you avoid costly delays and guarantee a smooth installation process. Proper planning now will save you time and effort later, leading to a durable and well-executed concrete project.
Ground Preparation Techniques
While you may have completed the site assessment, the next crucial step is ground preparation, which guarantees a solid foundation for your concrete installation.
Start by clearing the area of any debris, grass, or vegetation to secure optimal ground stability.
Next, assess the soil type; if it’s loose or sandy, you’ll need to improve soil compaction. Use a plate compactor or roller to compact the soil thoroughly, assuring it can withstand the weight of the concrete.
Aim for a uniform surface, making certain there are no low spots that could trap water.
Finally, consider adding a gravel layer for additional drainage and stability.
These steps will set the stage for a durable and long-lasting concrete installation.
Material and Tool Selection
Selecting the right materials and tools is essential for a successful concrete installation. You’ll need to choose the appropriate concrete types for your project, such as ready-mix, stamped, or reinforced concrete, depending on your specific requirements.
Next, gather essential tools like mixers, trowels, and finishing tools. Verify you’ve got quality equipment to guarantee precise results.
Don’t overlook tool maintenance; keeping your tools clean and in good condition will improve their performance and lifespan. Regularly check for wear and tear, and replace any damaged parts before starting your project.
Choosing the Right Concrete Mix
How can you guarantee that your concrete installation meets both aesthetic and functional requirements? Start by focusing on mix design considerations.
Determine the purpose of your project, whether it’s decorative or structural, as this will dictate the appropriate strength and durability needed.
Next, pay close attention to aggregate selection. Choose aggregates that suit your climate and project demands; for example, larger aggregates can improve strength, while smaller ones often yield a smoother finish.
Additionally, consider the water-to-cement ratio, which influences workability and long-term durability.
The Pouring Process Explained
Before you start pouring concrete, you need to prepare the site properly to guarantee a smooth process. This involves clearing the area, setting up forms, and checking for level surfaces.
Once you’re ready, you’ll apply specific pouring techniques and methods to achieve the best results.
Preparation of the Site
As you prepare the site for your concrete installation, it’s crucial to guarantee that the ground is level and free of debris, since any imperfections can affect the final result.
First, assess site access to confirm that trucks and equipment can easily maneuver in and out. Clear the area of any obstacles like branches, rocks, or old concrete.
Next, check local regulations regarding excavation and drainage to avoid any legal issues. If necessary, consult with a professional to verify compliance.
Establish proper drainage patterns to direct water away from the concrete.
Finally, mark the boundaries of your project area to visualize the layout.
With these steps completed, you’re well on your way to a successful concrete installation.
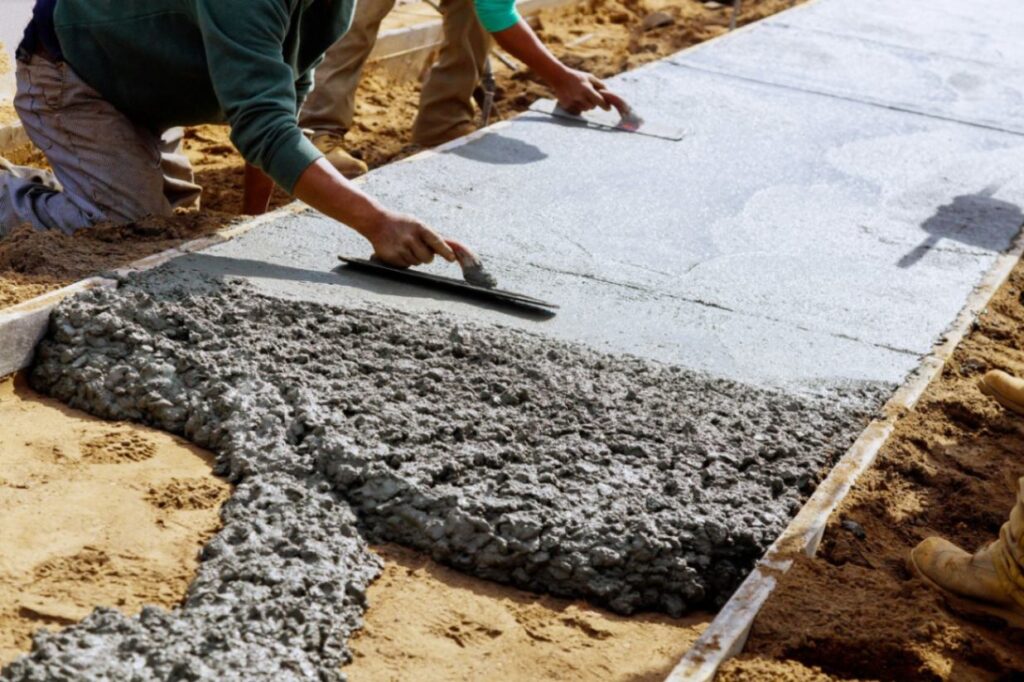
Pouring Techniques and Methods
Once you’ve prepared the site, it’s time to focus on the pouring techniques that will guarantee a smooth and durable finish.
Start by checking the pouring temperature; ideally, it should be between 50°F and 90°F to prevent issues like cracking.
When you’re ready to pour, use a concrete pump or chute to guarantee an even flow. As you pour, maintain a consistent pace to avoid cold joints.
After pouring, you can apply stamping techniques while the concrete is still wet, creating a textured surface.
Make certain to work in sections, allowing you to manage the finishing process effectively.
Finally, always monitor the curing conditions to guarantee ideal strength and longevity of your concrete installation.
Tools and Equipment Used in Concrete Work
When tackling a concrete installation project, having the right tools and equipment is essential for achieving a durable and aesthetically pleasing result.
Start with concrete mixers, which are vital for blending your materials evenly. Whether you choose a drum mixer or a stationary one, select based on the project size.
Next, you’ll need finishing trowels to smooth and shape the surface after pouring. These come in various sizes and shapes, allowing you to achieve the desired finish.
Other essential tools include shovels for moving the concrete, screeds for leveling, and edgers for clean joints.
Don’t forget safety gear like gloves and goggles to protect yourself during the process. Proper tools make a significant difference in the quality of your work.
Curing: Why It’s Essential for Durability
Curing is a critical step in the concrete installation process that directly impacts the material’s strength and longevity.
By maintaining ideal moisture and temperature levels, you guarantee that your concrete cures properly, leading to improved durability.
Understanding the benefits of proper curing will help you achieve a solid, long-lasting finish for your project.
Curing Process Overview
Understanding the curing process is vital for guaranteeing the durability of your concrete installation. Curing refers to the methods used to maintain adequate moisture, temperature, and time for your concrete to achieve its strength.
Various curing methods include water curing, where you keep the surface damp, and chemical curing, where curing compounds are applied to retain moisture.
The curing duration typically lasts from several days to a few weeks, depending on the specific conditions and concrete mix. During this time, it’s essential to monitor the concrete’s environment to prevent cracking and guarantee peak hydration.
Proper attention to these curing methods and duration will greatly improve the longevity and performance of your concrete structure.
Benefits of Proper Curing
Proper curing is vital for maximizing the durability of your concrete installation, as it directly influences the material’s strength and longevity.
By implementing effective curing techniques, such as moisture retention and temperature control, you guarantee that the concrete maintains the right hydration levels. This helps to prevent cracking and surface defects, which can compromise its structural integrity.
The curing duration is equally important; allowing adequate time for the concrete to cure—typically a minimum of seven days—can greatly improve its performance.
During this period, the chemical reactions necessary for strength development occur. By prioritizing proper curing, you not only extend the lifespan of your concrete but also save on future repair costs, making it a vital step in your installation project.
Finishing Techniques and Options
As you explore finishing techniques and options for your concrete installation, you’ll discover that the right choice can greatly elevate both the appearance and functionality of your surface.
One popular method is using decorative finishes, which can enhance aesthetics while providing texture and slip resistance. Techniques like staining and sealing not only add color but also protect your concrete from wear.
Additionally, stamping options allow you to mimic natural materials like stone or brick, giving your installation a sophisticated look.
Consider your environment and the intended use of the surface when selecting these techniques. Properly applied, these finishes can convert a basic slab into a stylish and durable feature of your property, making it a worthwhile investment.
Common Challenges During Installation
Even with the right finishing techniques in place, you might encounter several common challenges during concrete installation that can impact the final result.
One major hurdle is unexpected weather; rain or extreme temperatures can affect curing time and even result in surface issues. It’s essential to monitor forecasts and plan accordingly.
Another challenge is equipment failures, which can lead to delays and increased costs. Regular maintenance and checks on your tools can help mitigate this risk.
Additionally, improper site preparation can create problems, such as uneven surfaces or drainage issues.
Maintenance Tips for Your New Concrete Surface
To keep your new concrete surface looking great and lasting for years, follow these essential maintenance tips.
Regularly clean your concrete by sweeping away debris and using a pressure washer for deeper dirt removal.
Implement sealing techniques every few years to protect against moisture and stains; choose a sealer suitable for your surface type.
If stains occur, act quickly—use a mild detergent or specialized stain removal products to avoid permanent damage.
For oil or grease stains, sprinkle baking soda or absorbent material to lift the stain before washing.
Finally, avoid harsh chemicals and de-icing agents in winter, as they can deteriorate your concrete.
With proper care, your concrete will maintain its beauty for years to come.
Frequently Asked Questions
How Long Does Concrete Typically Last Before Needing Repairs?
Concrete typically lasts 25 to 30 years before needing repairs. By understanding concrete longevity and utilizing effective repair techniques, you can maintain its integrity and extend its lifespan, ensuring your surfaces remain durable and aesthetically pleasing.
Can I Install Concrete in Cold Weather?
Yes, you can install concrete in cold weather by using specific installation techniques. It’s essential to keep the mixture warm and use additives that accelerate curing, ensuring the concrete sets properly despite low temperatures.
What Are the Signs of Curing Problems?
You’ll notice signs of curing problems if there’s surface cracking or discoloration. Poor moisture control during curing can lead to these issues, so always implement effective curing techniques to guarantee your concrete sets properly and uniformly.
How Can I Prevent Concrete Cracking?
To prevent concrete cracking, you should understand cracking causes like shrinkage and temperature changes. Use prevention techniques such as proper curing, controlling moisture levels, and adding reinforcement to improve durability and minimize future issues.
Is It Safe to Walk on Freshly Poured Concrete?
Walking on fresh concrete isn’t safe until it’s set properly. Wait at least 24 to 48 hours before stepping on it, ensuring you prevent any damage or imprints that could compromise its integrity and appearance.
Conclusion
To summarize, understanding each phase of your concrete installation project is essential to achieving excellent results. From planning and site preparation to the pouring and curing stages, being engaged and informed will help you navigate the process smoothly. Remember, communication with your contractor is crucial in addressing any challenges that arise. By following these guidelines and maintaining your new surface, you’ll enjoy a durable and attractive concrete installation that meets your needs for years to come.