
Preparing your site for a concrete installation requires careful planning and execution. You’ll need to assess the area, gather the right tools, and guarantee proper drainage before you start. Each step plays a vital role in the final outcome, so it’s important not to overlook any detail. As you work through the process, you’ll discover specific techniques that can make all the difference in achieving a successful installation. Let’s explore those steps further.
Key Takeaways
- Verify site measurements and ensure they align with project plans for accuracy before commencing any work.
- Conduct a soil test to assess composition, moisture content, and stability for optimal concrete performance.
- Clear the area of debris, vegetation, and topsoil to establish a solid foundation for the concrete slab.
- Install effective drainage systems to manage runoff and prevent water accumulation around the concrete installation.
- Set up forms and reinforcement securely, ensuring alignment and stability to avoid shifting during the concrete pouring process.
Assessing the Area
How do you know if your site is ready for concrete installation? First, check your site measurements to verify they match your project plans. Accurate dimensions are essential for a successful pour.
Next, assess the soil conditions. You need stable, well-draining soil to support the weight of the concrete. If the soil is too loose or saturated, it can lead to cracking or settling after installation. Conduct a soil test to evaluate its composition and moisture content.
Remove any debris, vegetation, or topsoil that could affect the integrity of your slab. By carefully evaluating these factors, you’ll set a solid foundation for your concrete installation, guaranteeing durability and longevity for your project.
Gathering Necessary Tools
Once you’ve guaranteed your site is prepared, it’s time to gather the necessary tools for concrete installation.
Start with your tool selection: you’ll need a concrete mixer, trowels, a float, and a screed. Don’t forget safety gear like gloves, goggles, and a dust mask.
Check that all your equipment is in good working condition—this is essential for efficiency and safety.
Perform basic equipment maintenance, ensuring your mixer runs smoothly and your tools are clean and rust-free.
Organize everything in one spot for easy access during the job.
Having the right tools ready will make your concrete installation process seamless and less stressful.
Ensuring Proper Drainage
Before pouring concrete, guaranteeing proper drainage is essential to prevent future issues. Start by evaluating your site’s topography. Identify any low spots where water might accumulate and plan accordingly.
Install drainage systems, such as French drains or surface drains, to redirect water flow away from the concrete area. Make certain these systems are positioned correctly to handle runoff from surrounding areas.
You’ll also want to create a slight slope away from the concrete to encourage water to flow naturally toward the drains. Regularly inspect and maintain your drainage systems to guarantee they function effectively over time.
Leveling the Ground
Leveling the ground is an essential step in preparing for concrete installation. To achieve a smooth surface, begin by clearing debris and vegetation from the area.
Next, utilize ground compaction techniques, like a plate compactor or roller, to firmly pack the soil. This helps prevent settling after the concrete is poured.
Pay attention to soil moisture management; make certain the ground isn’t too wet or dry, as this can affect compaction. If the soil feels dry, lightly moisten it before compacting. Conversely, if it’s too wet, consider waiting for it to dry out.
After compacting, check for any low spots and fill them in, guaranteeing an even surface, which is crucial for a successful concrete installation.
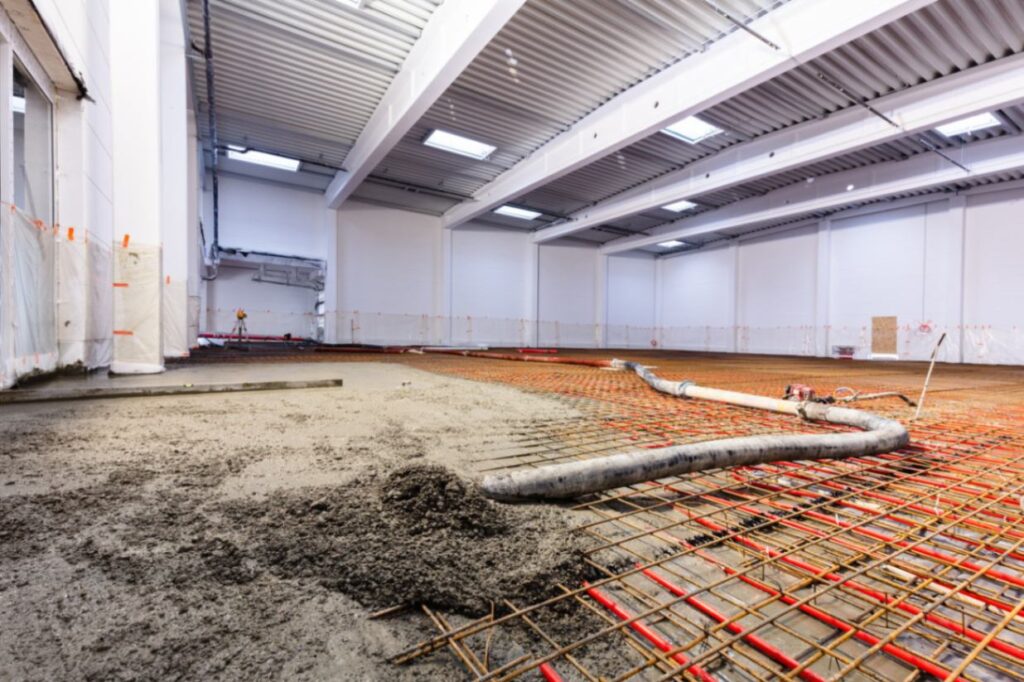
Setting Up Forms and Reinforcement
After guaranteeing your ground is level, setting up forms and reinforcement is the next vital step in concrete installation.
Start by selecting suitable form materials, such as plywood or metal, to shape the concrete. Make sure the forms are securely staked and level to prevent any shifting during pouring.
Next, choose the appropriate reinforcement types based on your project needs; options include rebar, wire mesh, or fiber reinforcement. Place the reinforcement within the forms, making certain it’s elevated slightly above the base to avoid contact with the ground.
This setup will improve the strength and durability of your concrete. Double-check everything for alignment and stability before moving on to the pouring stage. Proper preparation here pays off in the long run.
Frequently Asked Questions
Can I Pour Concrete in Cold Weather?
Yes, you can pour concrete in cold weather, but you need cold weather precautions. Use insulated blankets or heaters to maintain temperature and consider specific concrete curing methods to guarantee proper strength and durability.
How Long Should I Wait Before Walking on New Concrete?
You should wait at least 24 to 48 hours before walking on new concrete. This allows adequate curing time for surface strength, ensuring it can support weight without damage. Always check for specific requirements based on conditions.
What Types of Concrete Are Best for My Project?
When choosing concrete types, consider your project’s suitability. For driveways, use high-strength concrete; for decorative surfaces, opt for stamped or colored options. Always match the concrete’s properties to your specific needs for best results.
Do I Need a Permit for My Concrete Installation?
You’ll need to check local permit requirements for your concrete installation. Each area has specific installation regulations, so confirm with your local authority to guarantee you’re compliant and avoid potential fines or project delays.
How Do I Maintain My Concrete After Installation?
To maintain your concrete, seal it regularly to protect against moisture and stains. Avoid heavy loads during the curing period, and keep the surface clean to prevent cracks. Regular inspections help catch any issues early.
Conclusion
By following these essential steps, you’ll set the stage for a successful concrete installation. Assess the area for measurements and stability, gather your tools, and guarantee proper drainage. Level the ground to create a solid foundation, then carefully set up forms and reinforcement materials. With everything in place, you’re ready to pour the concrete. Taking the time to prepare your site thoroughly will lead to a durable and dependable finished product.